Wednesday, December 14, 2016

Book Bags in the Classroom

I was just going through my old posts and realized I have never written about book bags. I can't believe it, because I truly love using them. I would have thought that book bags would have been one of my first blog posts. Well, maybe I have written about them before and just didn't see the post. Either way, I decided to write about them now.

If you are a primary teacher and you don't use book bags in your classroom, I highly recommend them. I have always used them. When I taught Kindergarten my students would take home the little phonics and sight word readers that we used in class. Rereading the books with their family was part of their nightly homework. As the book bags started to get full I would have students take the books out and keep them at home rather than returning them. Another fun thing the Kindergartners always liked to do was buddy reading. Since they had reread the books so many times they always felt confident and successful. Those who did struggle could always be helped out by a friend since the books were familiar to them as well.

I used the book bags differently with my first graders. They would take a book home every night, which was at their Accelerated Reading (AR) level. When they finished the book and were ready they would test on the book. This was a great way for students to work on comprehension and to make sure they were progressing in their reading.

At one point I taught an after-school program. These students were not really given an actual "book bag," but they were given a reader to take home each night. The back page was a signature page. They had to read the book to 10 people and have them sign the page to prove the book had been read to them.

Another way I have used book bags is with struggling readers in my classroom. In this case, I would choose a book that I wanted them to work on for a period of time. It varied between Dr. Seuss books, phonics readers (I Love Reading), Houghton Mifflin Phonics Library books, or just a beginning-level book. My students would take these books home every night and were supposed to read these books with their parents. Unfortunately, for many of these students, it often did not seem like this was happening. Having the book bags was still helpful though. They knew what book they were supposed to be working on, so when they had the time in the classroom they could read independently, with a partner, or with me.

Ok, this is way more than I planned on writing, but all this is to say that book bags are a very useful tool in helping students build their reading skills. It sets an expectation for them as readers. It is enjoyable, especially if you let them pick their own books and the books are at their level. It helps strengthen comprehension. But, best of all it is easy to do. I hope that it is something you will consider doing if you aren't already.

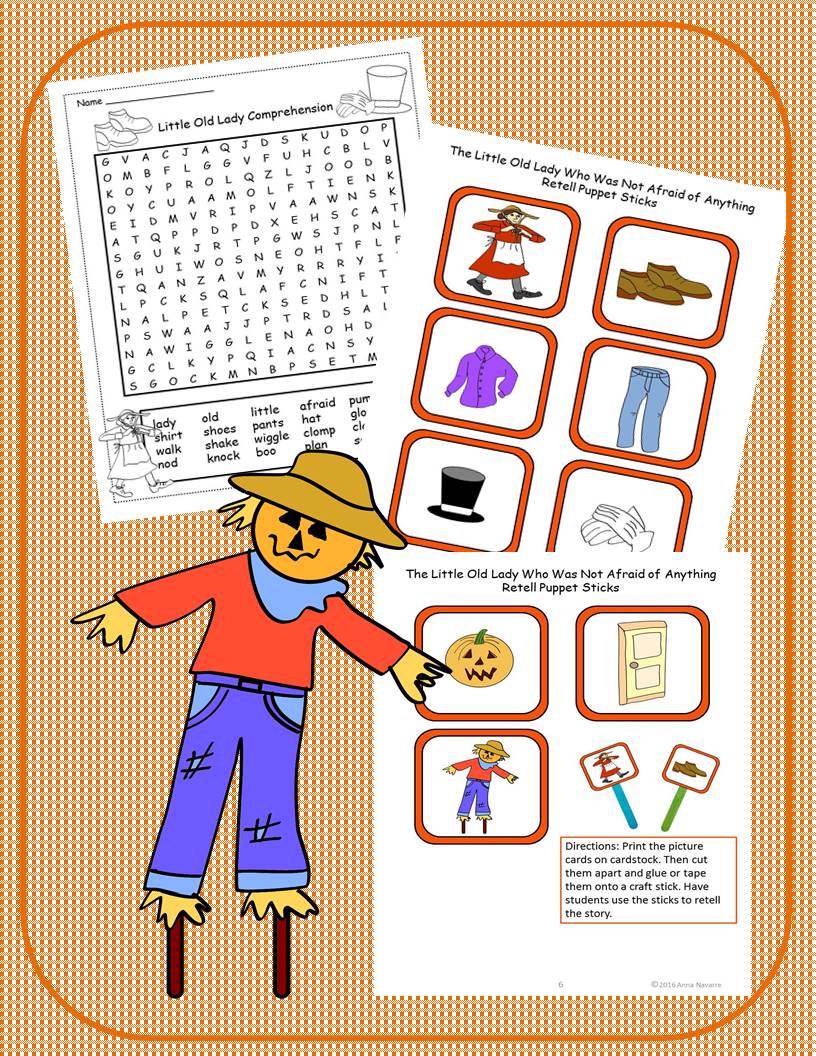
If you are interested I do have a book bag packet available at my TpT Store. It is a simple little resource that provides a  parent letter and a retell sheet for students to use. The parent letter is in both English and Spanish. I've provided the link for you in case you would like to check it out.


Saturday, December 10, 2016

Christmas Wreath Art Project


  I love this time of the year. It is a great time for art projects, especially since students are usually starting to get excited and antsy due to the holidays. This Christmas wreath is a fun and festive project that can keep your class busy for a good while. Playing some Christmas music makes it even more festive, plus it helps with the chatter that goes on between students as they enjoy this craft.

The Christmas wreath is a tear art project that requires very few supplies as you can see in the picture. Probably the most time consuming part of prepping the project is cutting out the center of the paper plates. You might want to see if you can recruit a parent helper to do this for you, but I actually don't mind doing this as I sit in front of the TV.

I'm sure you have figured out that the torn pieces of green paper just get glued onto the paper plate to make the wreath. Then a bow is added with some berries and glitter. It is an easy project, although younger students do sometimes tear the paper too small and take a long time to cover all the white on the plate. With some coaching they are fine and in the end, all of the wreaths come out beautiful.

While this is an easy project, I have made the complete instructions with helpful tips and the bow available as a FREEBIE on my TpT Store. I've provided the link below for you if you are interested.


Here are a couple of other Christmas resources that you may be interested in. 


Friday, October 21, 2016

Pumpkin Handprint

This Pumpkin Handprint idea is one that I got from my daughter. She did it for the children in her daycare. I liked it so much that I decided to share it with you. It might not be practical to do this with a large class, but it is a perfect idea for your own children or for a small group of children.


Here are the directions that my daughter shared with me for making one Pumpkin Handprint or footprint:

1 cup flour    
1 cup salt      
1/2 cup water

Mix together with hands until dough forms.
Roll it into a ball and place it on a baking pan lined with wax paper. Roll it out and push in the sides forming a pumpkin. (Makes sure to save a small amount of dough for the stem) shape your stem and push it onto the top. 

Push in the child's hand or foot (for smaller children, you can use both hands/feet).
Bake for 3 hours at 250 degrees. Let it cool, then turn the pumpkin over and bake it for an additional 1 hour. 

Once it is baked and cooled, paint your pumpkin. My daughter painted the whole pumpkin orange first and then let it dry, before painting it black. Once the pumpkin is dry, spray it with clear acrylic spray paint. The spray dries in an hour. 

I hope that you enjoy this very cute idea.

Thursday, October 20, 2016

Defining and Non-Defining Attributes of Shapes

Defining and Non-defining attributes can be a vague concept for students. The vocabulary alone is a bit tricky, so I created this packet as a resource to help students with this concept. I've used this packet in my classroom for a few years now and have found it very helpful. 

The purchased set includes complete directions on how I use this packet. I won't go into detail here, but basically I use students prior knowledge and informal discussions of shapes and then use the resources in the packet for at least 3-4 lessons in which I talk more formally about attributes.  

Here is kind of what it looks like in the classroom:

First Lessons – I introduce plane shapes by talking about the names of the shapes; the number of sides; the number of corners; how a circle is a shape with zero corners and sides; and how a shape must be closed in order to be a shape. I follow up my discussions with various worksheets (not included). 

Intro: Defining and Non-defining Attribute Lesson – In the next lessons I begin exposing students to the concept of attributes by discussing shapes and what makes a shape a shape. By the time we start this Defining and Non-Defining Attribute packet, students are ready to apply what they have learned. I begin the introduction of defining and non-defining attributes by using the colored sorting activity page and cards as a modeled lesson talking through my sort. 

Subsequent Lessons – I continue my introductory lesson the following day if needed, or at the very least do a quick review before continuing with the student sort. Once I feel that students are ready, I provide them with the student copy of the picture word sort. They are able to complete the sort on their own and then store them in a Ziploc bag. I like students to keep them for a while and use them as a review for a few days. 

Once we are done using the sort in class I have students take it home and share it with their family. It is a really good opportunity for parents to see the type of learning that is going on in the classroom, plus students love doing this. 

Here is a sample of what is included in the packet. It can be purchased from my TpT Store if you are interested. 

Defining and Non-Defining Attributes of a Shape


Here is a YouTube video that shows how I use this packet. 


Thursday, September 22, 2016

The Little Old Lady Who Was Not Afraid of Anything Activity Pack

 The Little Old Lady Who Was Not Afraid of Anything, written by Linda Williams, is one of my favorite seasonal books. My class has always enjoyed this book. The patterned sentences allow them to successfully read it. Since I like this book so much I decided to create an activity pack and make it available on my TpT Store. This packet provides resources and ideas for having fun with this book.

I like having multiple copies of this book. I use it for a whole class read and also for reading groups. I like to teach body movements to go along with the story. It helps to make this story more interactive. The movement ideas are included in the activity pack. The packet also includes other ideas and activities to use along with the book. One thing that is included is a student-friendly version of the story. Students read this page a couple of times, sometimes more. Then they cut the sentences apart, mix the pieces up, and put the story back together. There is also a comprehension page, a word search and retell puppet sticks included in this packet.   


If you are interested in this packet you can view it at Anna Navarre's TpT Store. Just click on the link below.


You might also be interested in knowing that there is a video version of this book on YouTube. It is done as a song, which is a great addition after you have read the book.


I hope that you have fun with this book. I always do. 


Tuesday, September 6, 2016

Homemade Playdough Recipe

One thing I have always loved using in my classroom is playdough. I especially like using it on special occasions, such as Halloween or Art Day, but I also like to use it at a center, or even at home with my grandchildren.

There is no doubt that children enjoy using playdough, but some people hesitate to use it. Yes, it can get a bit messy if you are using it on a carpeted area or don't use a work mat, but those are just things to consider before you pull it out.

Using playdough is a great way to have students use their imagination. When we did the ABC Countdown at the end of the year, we had Art Day. I let students use the playdough for sculpturing. On Halloween or Pumpkin Day, students used orange playdough to make jack-o-lanterns. This is always fun, but I also like using playdough for academics. When I taught kindergarten I had students use the playdough to work on their letters. In first grade the students use the playdough for spelling words, Using the playdough for academics still allows students to be a little creative, but the focus is on learning in a fun and unique way.

You may already have your own favorite playdough recipe, but I thought I would provide this one for anyone who might need it. I have used this recipe for at least 15 years and still love it. I hope that you enjoy it as well.

Playdough Recipe

Ingredients:
3 cups flour
1 and 1/2 cups of salt
3 tablespoons oil
3 teaspoons cream of tartar
3 cups of water
1 package of Kool-Aid

Mix all of the ingredients in a pan over low/medium heat until playdough lumps together. Continue to heat until playdough is no longer sticky. Remove the playdough from the pan and knead it until it is smoothe in texture. Be careful because it may be hot.

I usually make 2 batches of the recipe for 25-30 students. Once the playdough is done I like to store it in a gallon size zip-loc bag until it cools. Then I divide the playdough up and put it in individual sandwich bags for each student. If I am using the playdough as a center activity I just store it in and air tight container.

I hope you have fun with this playdough recipe.

Anna Navarre's TpT Store

Thursday, September 1, 2016

Biographies - People in History

I've been busy this summer working on various biography packets. My grandson studied many different American figures during 2nd grade last year. He really enjoyed this, which motivated me to work on these packets. I personally love studying about people in history, so I thought it would be a fun summer project. I have 10 different packets, which include: Amelia Earhart, Eleanor Roosevelt, Harriet Tubman, Florence Nightingale, Marie Curie, Mother Teresa, Albert Einstein, George Washington, Martin Luther King, Jr. and Neil Armstrong. All of these packets are available at my TpT store.

 The packets are about 25 pages long. There are various reading and writing activities in the packets to help students learn about these people. The packets are timeline focused. If you visit my TpT Store to check out these biographies you can click on the preview page to see exactly what is included.

Here are the links to the various biographies:
Mother Teresa
https://www.teacherspayteachers.com/Product/Mother-Teresa-People-in-History-2686319

Martin Luther King, Jr.
https://www.teacherspayteachers.com/Product/Martin-Luther-King-Jr-People-in-History-2748912

Marie Curie
https://www.teacherspayteachers.com/Product/Marie-Curie-People-in-History-2655310

Amelia Earhart
https://www.teacherspayteachers.com/Product/Amelia-Earhart-People-in-History-2686323

Neil Armstrong
https://www.teacherspayteachers.com/Product/Neil-Armstrong-People-in-History-2762609

George Washington
https://www.teacherspayteachers.com/Product/George-Washington-People-in-History-2748808

Eleanor Roosevelt
https://www.teacherspayteachers.com/Product/Eleanor-Roosevelt-People-in-History-2655224

Harriet Tubman
https://www.teacherspayteachers.com/Product/Harriet-Tubman-People-in-History-2644746

Florence Nightingale
https://www.teacherspayteachers.com/Product/Florence-Nightingale-People-in-History-2644735

Albert Einstein
https://www.teacherspayteachers.com/Product/Albert-Einstein-People-in-History-2722456


Sunday, August 21, 2016

Back to School Freebie

On the first day of school, students love to see something special on their desks. Placing a Welcome Back to School card on their desk, especially with their name on it, helps students to feel special. Adding a bookmarker, which of course students will soon need, also adds to the excitement.

I created this Freebie a few years ago and thought I would share it in case anyone needs it. The set comes in both color and black and white. Providing students with the black and white version, while not as colorful, is a good resource to be used as students are getting settled. You can have students begin coloring their bookmarkers and welcome cards as you take attendance; get everyone settled; or even just take a breath to get ready for your day.

This resource can be downloaded for free from Anna Navarre's TpT Store. Here is the link: 


I hope that you enjoy this resource and I pray that you have a super great school year!

Thursday, August 18, 2016

Four Squares - Getting to Know You


I just read about this Four Square getting to know you activity and thought it sounded like a super easy thing to do in the classroom during the first day or week of school. I got the idea from the California Educator.

Here is what you do...Pass out a blank piece of paper to students and have them fold it in fourths. Have students write their name at the top and then write "friends, favorites, fun, and family" in each of the squares. Then have students complete the squares by either writing, drawing, or adding pictures to each block. As a quick, in the classroom activity, I would just have them write and draw. But, if I wanted to turn it into something bigger then I would assign it as a homework project.

After students complete the project you can have them share it with their classmates. I would have them do a kind of stop the music activity in which students move around the classroom to the music and then find a new partner to share their project with every time the music stops.

I hope you enjoy this little Back to School idea. Have a great school year!

You might also be interested in this packet.

Thursday, June 30, 2016

Leap Frog Letter Factory

Many years ago, when I taught kindergarten, I needed a resource for helping my struggling students learn their letters and sounds. When I would conference with parents they would often claim that their children did know their letters. This usually meant they could sing the abc song or say the letter names in order. As students begin to read they need to not only know their letters and sounds in order, but randomly and with automaticity (knowing it without having to think about it).

Educational resources were pretty limited back then. We didn't have the YouTube resources that are now available or the educational apps that we could download. The limited resources that were available, were often very expensive. During this time I found myself relying heavily on Leap Frog products.

My number one "go to" resource was this Leap Frog Letter Factory video. I ended up buying several copies and sending them home for parents to use with their children. Now keep in mind this was during the VHS cassette period. Wow, I'm making myself sound really old! Anyways, I found success with students that were faithfully watching the video at home and also with students who I was using it for in class. During whole class instruction I would introduce a letter and then sing the letter song. All students were familiar with the Letter Factory.

As I began to have grandchildren, my children and I used the video to help my grand kids learn their letters and sounds. That too was many years ago, but with a new addition to our family, I wanted to give my daughter a copy of this video to use. My grandson is only 6 months old, but my daughter is also babysitting a 3 year old, so I thought the video would be perfect. The problem was that all of my copies were VHS, so that meant I had to purchase a new one. I actually found a used copy on ebay for about $5.00. What a steal! This recent purchase has reminded me of what a valuable tool this video is, I absolutely love it, so I thought I would share this FYI blog with you.


Anna Navarre’s TpT Store


Friday, June 24, 2016

Hand Art

This art project makes a cute beginning of the year activity, although my class actually did it as an ending of the year thank you gift to our classroom aide.

I've seen hand cut outs that can be used, but I wanted to make the project more personal. I traced students' hands onto green cardstock paper. I'm sure white or any other color is fine. I just liked having a color backing in case students didn't completely color in the hand.

After I traced a student's hand with a sharpie I wrote their name on their paper. The next day I gave everyone their hand and showed them some ideas for designing their hand with markers. They all came up with their own original ideas, which made each hand more special.

Once all of the art work was done I cut out the hands. Older students could, of course, do this part on their own, but I didn't want to trust it with my first graders. I cut the hands out and then wrote the names on the back of the hands.

I used another piece of green cardstock paper for mounting the hands onto. I tried cutting a big circle, but I had too many hands, so I ended up just rounding the edges. I arranged all of the hands in place to make sure I was happy with it before I glued anything. I placed the larger hands down for the first layer. The next layer was the medium size hands and the final layer was the smaller hands. After I had the hands laid out I picked up the top two layers keeping each layer together. I glued the bottom layer by leaving the hands in place and picking up one at a time to glue it on. I continued this process for the next two layers. I had one extra small hand, so I put that in the middle.

I wrote a thank you note on the back. Afterwards I found a class picture, which I gave to my aide as well. I wish I hadn't written the note on the back, because I would have glued the picture there instead.


Please feel free to visit 
Anna Navarre's TpT Store


Tuesday, June 7, 2016

Father's Day Tie Card


This is a Father's Day card that I have my students make for their dads. I usually have a parent cut out the pattern, but then after that they are pretty easy for students to make.


If you are doing this whole class it is easiest to start off with a tie pattern. In order to make the pattern fold a 9" x 12" piece of construction paper in half. Then draw two trapezoids across from each other. Snip off two triangle pieces at the bottom of the tie. In order to make the rest of the ties you can just trace the pattern. I have reused the same pattern for years. You can decide if you want to draw the tie knot or have students draw it on.


Provide each student with a tie. Have students open up the card and write a Father's Day message. I usually model this on the board, but allow students to either copy mine or write whatever they want. Remind students to sign their name. 

Once students have finished their writing they can use a black crayon to draw the knot on the tie if this has not been done for them. Then they can color the ocean floor and some plants/rocks. As students are ready you can have them use sea creature sponges to finish off their tie. I don't really remember where I purchased these sea creatures, because I got them quite a few years ago, but I believe I  purchased them from a dollar store. If you can't find sea creatures sponges you could cut up a sponge to make your own or just have student paint something simple like a fish, whale, or a starfish. 


I hope that you find this Father's Day idea helpful. Anna


Anna Navarre's TpT Store


Sunday, June 5, 2016

Flower Pots


This Flower Pot project is a fun project that I like to do when my class is learning about plants. It is kind of messy but worth it. I love to see how students put their own special spin on the project to make their art more personal and unique. 


Here are the directions for doing this project.

Materials:
- Blue, green, and brown tempera paint
- Other tempera paint colors for the flowers
- 8" x 11" White cardstock or construction paper 
- 9" x 12" Yellow or other color construction paper 
- 9" x 12" construction paper to use as a work mat 
- Paint brushes
- Containers for paint (I like to use pie tins)

Directions:
Be sure to prep your materials beforehand, especially if you are doing this whole class. When you put the paint in the containers you will want to water it down a little if it is too thick. Place the blue paint and paint brushes out for students to use. 

Once all of your supplies are ready then you can provide students with the work mat and white paper. Have students write their name on the back of the paper before they get started. Then have them paint the whole page blue. My students know that I have a "no white" rule. They need to make sure that there is no white showing when they are done.

The paint needs to dry for a couple of minutes, so as students finish I have them go to the carpet and read while they wait. This project does require quite a few paint brushes if you are doing this activity whole class, so you will want to wash out the paint brushes while the blue paint is drying. You can also remove the blue paint and put out the other paint.

After the paint has pretty much dried you can have students go back to their seat. Then show them different ways to paint a flower pot/vase (round, square, or triangular). You will also want to show them how to add the stems, leaves, and flowers. I usually only have my students use two colors. The middle of the flower is one color and then the petals are another color. Show your students different ways in which the flower petals can be made. I usually show them how to either brush out a petal or dab the brush down to make the petal. Students always tend to do what works for them and what they like, so it doesn't really matter. 

Let the painting dry before mounting them onto the colored construction paper. Once they are dry enough to stack I like to place some books on top of them to flatten them out. Then I glue them onto the mounting paper and write their name at the bottom of the page. I then of course hang them up for all to see. 


Anna Navarre's TpT Store


Teachers Appreciation Poster

This was a really neat poster that our PTO made for the teachers at my school. I'm sure it has been done before, but I have never seen it, so I thought I would share it with you to enjoy.

Here is what it says:
Thank you, teachers! You are all Sweetarts. You deserve 100 Grand every Payday. We know sometime our kids act like Air Heads or like they're from somewhere beyond the Milky Way. You bring them such Almond Joy when you teach. It must be hard to contain your Snickers when those Sugar Babies tell you Mounds of stories. Sometimes it must seem that all you do is Skor papers and you want to make like Baby Ruth and run home! For all you do, thanks! you are numero U-no.

I hope you enjoyed this poster as much as I did.
Anna


Anna Navarre's TpT Store

Saturday, May 21, 2016

Timers for the Classroom

As a teacher, I have always used timers as a very useful tool in the classroom. I use them for reading groups, math rotations, computer time, students support, and for my reading assessments. I also use them for choice whole class activities, such as 5 minute quick writes or 10 minutes of independent/silent reading. I usually just use digital timers, but I love using the free online timers when I am doing something whole class.

The online timers are really fun and give students a visual as to how much time they have left. You might think this would be a distraction, but it is not as distracting as students claiming to be done with their work or wondering how much longer they need to keep working on a task.

Initially, students are curious about the different timers and watch it more closely, but less so after they have seen what the timers do. At this point my students just glance up at the timer to see how much time is left. They still want to be ready for it when it goes off, but for the most part they just keep working.

The funny thing about the timers, and kind of an unexpected side effect, is that my students have definitely gotten better at counting back. They don't, of course, count down the whole 5-10 minutes, but they really start watching the last 20 seconds or so. This is key for some of my students who have struggled with using the counting back
math strategy.

If you haven't tried the free online timers I recommend you check them out and play around with them. You will want to decide on the timers that you feel are appropriate. There are bomb and dynamite timers, and you may not feel comfortable with using them. The racing timers are fun to watch, but seem to be a little bit more of a distraction for my students. It's not that I can't use them, I just have to be more selective as to when to use them. Anyways, I hope that you find them to be a useful tool.


Here is the link to the online-stopwatch timers.


Also, feel free to visit my TpT store.
Anna Navarre's TpT Store 


Saturday, May 14, 2016

End of the Year Ideas for the Classroom

So, it is that time of the year again. We have one month of school left and my students are starting to realize that the year is quickly coming to an end. My job... to keep them engaged and learning. I know this isn't always easy to do and I'm thinking it is not just me, so I thought I would share some ideas for helping to make the final days of the school year enjoyable for both you and your students.

Several years ago one of my team members shared an ABC Countdown Calendar that she had gotten from a friend. I don't know who that person was, but I will forever be grateful to her. This ABC Countdown makes the last 26 days of school really fun and helps my students and I get through the end of the year. There are activities for everyday. Some are very simple and some are more complex, but it really depends on how far you want to take it. The first day is of course "A" day, which is Art Day for my class. I have my students watch videos and read about various artists; use play-dough for sculpturing; watch and do directed drawings; and then a bigger art project. You can see it can get really big, but then there are really easy days like "H" Day, which is Hat Day. I just let students wear their hats all day.

 Since the ABC Countdown is not a product that I created I can't share the actual calendar (although this one has been modified), but it is really just the idea that you need. Even if I did provide the calendar the dates would be off, so I recommend you making one on your own with the activities that work for you.

Here is a clearer sample of what I use and how it is set up.
There are lots of other things that I like to do to keep my students engaged. Not just at the end of the year, but throughout the year as well. My students love doing the STEM activities. Students focus on science, technology, engineering and math, along with reading, writing, critical thinking, cooperative learning and more. I have several STEM Activities available at my TpT Store if you are interested. 

Science activities are always a fun way to get students engaged. I actually use my Science Experiment Day packet on "S" Day. It is definitely one of those way over the top days, but it is my favorite ABC Countdown day. You don't actually need to do all of the science experiments in one day, but it is super fun. I'm already getting all my supplies ready. I can't wait!

Another fun science activity for students is to have them explore things that sink or float in water. It is really fun to do this outside on a hot day. There is bound to be water that has managed to find its way out of the container and onto the students. 

There are lots of things I like for the end of the year, but one last idea is to focus on a habitat. We do the rain forest, polar regions, and the desert during the year, but at the ending of the year we focus on the ocean. I happen to have two turtles, two crabs, and I usually have a beta fish. I also have lots of shells, rocks, plastic sea creatures, and other miscellaneous ocean things. I put all this stuff out, along with some books, on my exploration table. The students love it. I also have a thematic packet that I use to help students learn about the habit and/or to practice other skills. 

I hope that you have been able to gleam some ideas that you can use to help make the ending of your school year an enjoyable one. I have included links to some of the resources that I have mentioned. Please feel free to check them out. 

Anna


STEM Build a Tower

STEM Super Hero

STEM Build a Vehicle

You can visit my TpT Store to see more STEM or other activities.


Science Experiment Day
https://www.teacherspayteachers.com/Product/Science-Experiment-Day-1245181

Sink or Float Activity
https://www.teacherspayteachers.com/Product/Sink-or-Float-Activity-Set-2146855


Ocean Themed Activities
https://www.teacherspayteachers.com/Product/Ocean-Themed-Activities-1880350

Rain Forest Themed Activities
https://www.teacherspayteachers.com/Product/Rain-Forest-Themed-Activities-1615324

Desert Themed Activities
https://www.teacherspayteachers.com/Product/Desert-Themed-Activities-1622748


Wednesday, March 30, 2016

Roll a Word Activity

 It is funny how easily things can be turned into a learning activity. I had some small waffle balls under my cabinet that I hadn't used for a long time. Coming across these balls reminded me of this Roll a Word activity that I hadn't had my students play in awhile. I decided it was time to pull these balls out and use them again. 

Everyday I start off with a phonics lesson. I have my weekly phonics words posted on my whiteboard, so the words are available for our daily review and for students to practice anytime they come to the carpet. After we review the words I always have my students do a phonics activity. I prefer interactive activities, so this Roll a Word activity was perfect. 

In order to play this game I gave my students a ball and had them partner up. Students then chose a word from the word list. The first student rolled the ball and said the word.  Then the players took turns rolling the ball back and forth spelling the word. The student who had the final roll repeated the word. Students choose another word and repeated the process.


If you are interested in more interactive word activities you can check out this 20 page packet that I have available on my TpT Store. 


Tuesday, March 22, 2016

Outer Space Art

I wanted a new art project to go with my Earth unit, so after some internet surfing I  put a couple of ideas together and came up with this project. I really liked the way the project turned out, so I thought I would share the idea with you.

As you can see students basically just used a two or three different markers to make the spiral design. Then I provided students with an outer space page that they colored, cut and glued onto the page. Once the project was done I mounted it onto another sheet of paper to give a framed look.

It was really amazing to see the color combinations and the spiral designs that my first graders came up with. I would love to put these in a frame and give them as Father's Day gift, but they are going the the memory books.

I have posted the complete instructions and the outer space page on my TpT Store as a FREEBIE if you are interested you can visit the link below to download it.


Anna Navarre's TpT Store

Saturday, March 12, 2016

Tic-Tac-Toe with Words

I like to provide my students with fun and interactive ways to practice their words. One activity that I use during my phonics time is Tic-Tac-Toe with words. All of my students have reusable pockets and whiteboard markers, so it is easy for me to have my students pull them out to use.

Tic-Tac-Toe with words is super easy to play. I begin by reviewing all of the words that I have posted on the board with my class. Then I have students partner up and get out their reusable pockets or whiteboards, whiteboard markers and erasers.

Once students are ready to play they need to draw the Tic-Tac-Toe grid on their board. I initially had to show my students how to do this. It took them a couple of times, but they got it. The big issue was making the grid large enough for a word to fit. After students have finished their grid then each player picks a word. The game is then played much like the regular Tic-Tac-Toe, but with words instead of X's and O's. The first player writes their word in a box and says the word. The next player does the same thing using their own word. Players take turns writing and reading their words as they try to get three in a row. The first person to get three in a row is the winner. Students play again, but this time they need to pick an new word.

I hope that you will enjoy this idea. I know that my students enjoy it.


Please feel free to visit my TpT Store for other teaching resources. You can also follow my TpT Store to get notifications of new and free product postings.

Anna Navarre’s TpT Store


Sunday, February 28, 2016

Equation Roll a 6 Game

As a TpT seller and teacher I am always trying to come up with new activities. My husband helps me come up with ideas as well. This Equation Roll a 6 Game is a game that he thought up. He gave me the idea and then I put it together. It is a pretty simple game. It is interactive and fun. Basically, a student works to make equations until their partner rolls a 6. Once a 6 is rolled they need to stop. Then they try rolling a 6 while the other person works to make the equations. The first person to complete their board is the winner.

My students have really been enjoying this game. It is the right time of the year for them, because they have some foundational skills and are ready for this type of practice.  We've been playing this game as a whole class activity, with students partnering up to play. It has been a great resource to pull out when I want to give students an activity that serves as kind of a brain break, but still provides practice time.

This product is available at my TpT Store if you are interested.


Monday, January 18, 2016

STEM Activities in the Classroom

My first grade class is having a blast with STEM activities. It is amazing to see the critical thinking and problem solving going on. We started working on the Building a Tower activity on Friday, so I took some pictures. We did our initial planning of the design, note taking, and built the towers. We plan to finish and display the towers on Tuesday.

It is kind of funny, because I initially thought that students would use the index cards to create their towers, but they had their own ideas. I didn't show them any pictures of student constructed projects ahead of time. I just showed them pictures of real towers.

I had asked my class to bring in a cereal or some other small box, but I only gave them a couple days notice and I didn't send home a note. Only about 7 of my students brought in boxes, but this worked out fine. I just threw in foam plates for them to use as a base for stacking.


My students used my STEM Activity - Building a Tower packet for this project. I have created others as well. I've included the links if you would like to check them out.


Build a Habitat 

Build a Vehicle

Build a Tower

Build a Robot

Build a Carnival Ride