Friday, October 21, 2016

Pumpkin Handprint

This Pumpkin Handprint idea is one that I got from my daughter. She did it for the children in her daycare. I liked it so much that I decided to share it with you. It might not be practical to do this with a large class, but it is a perfect idea for your own children or for a small group of children.


Here are the directions that my daughter shared with me for making one Pumpkin Handprint or footprint:

1 cup flour    
1 cup salt      
1/2 cup water

Mix together with hands until dough forms.
Roll it into a ball and place it on a baking pan lined with wax paper. Roll it out and push in the sides forming a pumpkin. (Makes sure to save a small amount of dough for the stem) shape your stem and push it onto the top. 

Push in the child's hand or foot (for smaller children, you can use both hands/feet).
Bake for 3 hours at 250 degrees. Let it cool, then turn the pumpkin over and bake it for an additional 1 hour. 

Once it is baked and cooled, paint your pumpkin. My daughter painted the whole pumpkin orange first and then let it dry, before painting it black. Once the pumpkin is dry, spray it with clear acrylic spray paint. The spray dries in an hour. 

I hope that you enjoy this very cute idea.

Thursday, October 20, 2016

Defining and Non-Defining Attributes of Shapes

Defining and Non-defining attributes can be a vague concept for students. The vocabulary alone is a bit tricky, so I created this packet as a resource to help students with this concept. I've used this packet in my classroom for a few years now and have found it very helpful. 

The purchased set includes complete directions on how I use this packet. I won't go into detail here, but basically I use students prior knowledge and informal discussions of shapes and then use the resources in the packet for at least 3-4 lessons in which I talk more formally about attributes.  

Here is kind of what it looks like in the classroom:

First Lessons – I introduce plane shapes by talking about the names of the shapes; the number of sides; the number of corners; how a circle is a shape with zero corners and sides; and how a shape must be closed in order to be a shape. I follow up my discussions with various worksheets (not included). 

Intro: Defining and Non-defining Attribute Lesson – In the next lessons I begin exposing students to the concept of attributes by discussing shapes and what makes a shape a shape. By the time we start this Defining and Non-Defining Attribute packet, students are ready to apply what they have learned. I begin the introduction of defining and non-defining attributes by using the colored sorting activity page and cards as a modeled lesson talking through my sort. 

Subsequent Lessons – I continue my introductory lesson the following day if needed, or at the very least do a quick review before continuing with the student sort. Once I feel that students are ready, I provide them with the student copy of the picture word sort. They are able to complete the sort on their own and then store them in a Ziploc bag. I like students to keep them for a while and use them as a review for a few days. 

Once we are done using the sort in class I have students take it home and share it with their family. It is a really good opportunity for parents to see the type of learning that is going on in the classroom, plus students love doing this. 

Here is a sample of what is included in the packet. It can be purchased from my TpT Store if you are interested. 

Defining and Non-Defining Attributes of a Shape


Here is a YouTube video that shows how I use this packet. 


Thursday, September 22, 2016

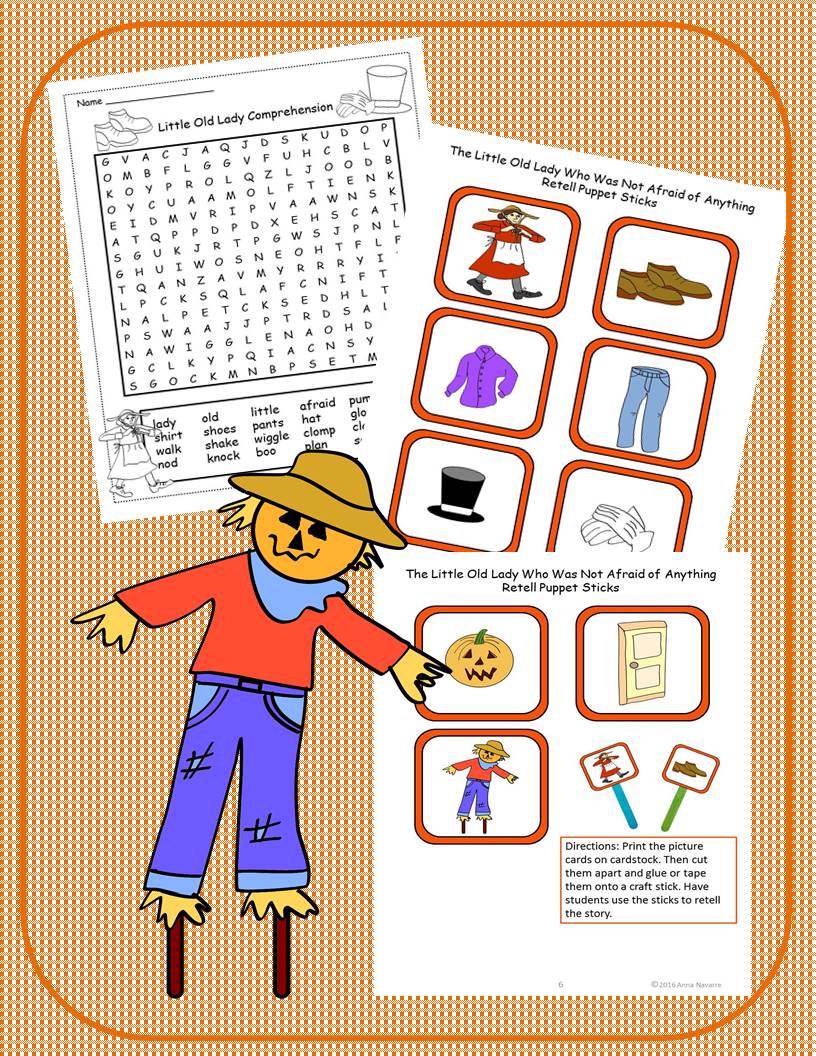
The Little Old Lady Who Was Not Afraid of Anything Activity Pack

 The Little Old Lady Who Was Not Afraid of Anything, written by Linda Williams, is one of my favorite seasonal books. My class has always enjoyed this book. The patterned sentences allow them to successfully read it. Since I like this book so much I decided to create an activity pack and make it available on my TpT Store. This packet provides resources and ideas for having fun with this book.

I like having multiple copies of this book. I use it for a whole class read and also for reading groups. I like to teach body movements to go along with the story. It helps to make this story more interactive. The movement ideas are included in the activity pack. The packet also includes other ideas and activities to use along with the book. One thing that is included is a student-friendly version of the story. Students read this page a couple of times, sometimes more. Then they cut the sentences apart, mix the pieces up, and put the story back together. There is also a comprehension page, a word search and retell puppet sticks included in this packet.   


If you are interested in this packet you can view it at Anna Navarre's TpT Store. Just click on the link below.


You might also be interested in knowing that there is a video version of this book on YouTube. It is done as a song, which is a great addition after you have read the book.


I hope that you have fun with this book. I always do. 


Tuesday, September 6, 2016

Homemade Playdough Recipe

One thing I have always loved using in my classroom is playdough. I especially like using it on special occasions, such as Halloween or Art Day, but I also like to use it at a center, or even at home with my grandchildren.

There is no doubt that children enjoy using playdough, but some people hesitate to use it. Yes, it can get a bit messy if you are using it on a carpeted area or don't use a work mat, but those are just things to consider before you pull it out.

Using playdough is a great way to have students use their imagination. When we did the ABC Countdown at the end of the year, we had Art Day. I let students use the playdough for sculpturing. On Halloween or Pumpkin Day, students used orange playdough to make jack-o-lanterns. This is always fun, but I also like using playdough for academics. When I taught kindergarten I had students use the playdough to work on their letters. In first grade the students use the playdough for spelling words, Using the playdough for academics still allows students to be a little creative, but the focus is on learning in a fun and unique way.

You may already have your own favorite playdough recipe, but I thought I would provide this one for anyone who might need it. I have used this recipe for at least 15 years and still love it. I hope that you enjoy it as well.

Playdough Recipe

Ingredients:
3 cups flour
1 and 1/2 cups of salt
3 tablespoons oil
3 teaspoons cream of tartar
3 cups of water
1 package of Kool-Aid

Mix all of the ingredients in a pan over low/medium heat until playdough lumps together. Continue to heat until playdough is no longer sticky. Remove the playdough from the pan and knead it until it is smoothe in texture. Be careful because it may be hot.

I usually make 2 batches of the recipe for 25-30 students. Once the playdough is done I like to store it in a gallon size zip-loc bag until it cools. Then I divide the playdough up and put it in individual sandwich bags for each student. If I am using the playdough as a center activity I just store it in and air tight container.

I hope you have fun with this playdough recipe.

Anna Navarre's TpT Store

Thursday, September 1, 2016

Biographies - People in History

I've been busy this summer working on various biography packets. My grandson studied many different American figures during 2nd grade last year. He really enjoyed this, which motivated me to work on these packets. I personally love studying about people in history, so I thought it would be a fun summer project. I have 10 different packets, which include: Amelia Earhart, Eleanor Roosevelt, Harriet Tubman, Florence Nightingale, Marie Curie, Mother Teresa, Albert Einstein, George Washington, Martin Luther King, Jr. and Neil Armstrong. All of these packets are available at my TpT store.

 The packets are about 25 pages long. There are various reading and writing activities in the packets to help students learn about these people. The packets are timeline focused. If you visit my TpT Store to check out these biographies you can click on the preview page to see exactly what is included.

Here are the links to the various biographies:
Mother Teresa
https://www.teacherspayteachers.com/Product/Mother-Teresa-People-in-History-2686319

Martin Luther King, Jr.
https://www.teacherspayteachers.com/Product/Martin-Luther-King-Jr-People-in-History-2748912

Marie Curie
https://www.teacherspayteachers.com/Product/Marie-Curie-People-in-History-2655310

Amelia Earhart
https://www.teacherspayteachers.com/Product/Amelia-Earhart-People-in-History-2686323

Neil Armstrong
https://www.teacherspayteachers.com/Product/Neil-Armstrong-People-in-History-2762609

George Washington
https://www.teacherspayteachers.com/Product/George-Washington-People-in-History-2748808

Eleanor Roosevelt
https://www.teacherspayteachers.com/Product/Eleanor-Roosevelt-People-in-History-2655224

Harriet Tubman
https://www.teacherspayteachers.com/Product/Harriet-Tubman-People-in-History-2644746

Florence Nightingale
https://www.teacherspayteachers.com/Product/Florence-Nightingale-People-in-History-2644735

Albert Einstein
https://www.teacherspayteachers.com/Product/Albert-Einstein-People-in-History-2722456


Sunday, August 21, 2016

Back to School Freebie

On the first day of school, students love to see something special on their desks. Placing a Welcome Back to School card on their desk, especially with their name on it, helps students to feel special. Adding a bookmarker, which of course students will soon need, also adds to the excitement.

I created this Freebie a few years ago and thought I would share it in case anyone needs it. The set comes in both color and black and white. Providing students with the black and white version, while not as colorful, is a good resource to be used as students are getting settled. You can have students begin coloring their bookmarkers and welcome cards as you take attendance; get everyone settled; or even just take a breath to get ready for your day.

This resource can be downloaded for free from Anna Navarre's TpT Store. Here is the link: 


I hope that you enjoy this resource and I pray that you have a super great school year!

Thursday, August 18, 2016

Four Squares - Getting to Know You


I just read about this Four Square getting to know you activity and thought it sounded like a super easy thing to do in the classroom during the first day or week of school. I got the idea from the California Educator.

Here is what you do...Pass out a blank piece of paper to students and have them fold it in fourths. Have students write their name at the top and then write "friends, favorites, fun, and family" in each of the squares. Then have students complete the squares by either writing, drawing, or adding pictures to each block. As a quick, in the classroom activity, I would just have them write and draw. But, if I wanted to turn it into something bigger then I would assign it as a homework project.

After students complete the project you can have them share it with their classmates. I would have them do a kind of stop the music activity in which students move around the classroom to the music and then find a new partner to share their project with every time the music stops.

I hope you enjoy this little Back to School idea. Have a great school year!

You might also be interested in this packet.