Wednesday, September 23, 2026

Why Escape Rooms Are a Great Learning Activity for the Classroom


Have you ever watched your students become completely absorbed in an activity because it felt more like a game than a lesson?

That is one reason classroom escape rooms have become such a fun way to get students learning, thinking, collaborating, and solving problems.

An escape room doesn't need elaborate decorations, complicated technology, or hours of prep. With a print-and-go classroom escape room, teachers can turn an ordinary lesson into an interactive challenge that gets students excited about learning.

Whether you're teaching reading, grammar, math, science, history, or Bible lessons, an escape room can be adapted to fit almost any subject.

What Is a Classroom Escape Room?

A classroom escape room is an activity where students work through a series of challenges, questions, puzzles, or clues to reach a final goal.

Instead of simply completing a worksheet and turning it in, students have a reason to keep going:

Can we solve the next challenge?

Students may need to:

  • Read and understand information

  • Answer questions

  • Solve math problems

  • Find clues

  • Decode messages

  • Put information in the correct order

  • Use critical-thinking skills

  • Work with classmates

  • Complete a final challenge

The goal might be to "escape" from a room, solve a mystery, discover a secret message, or complete a mission.

And the best part?

Students are practicing important skills while they are having fun.


7 Reasons to Use Escape Rooms in Your Classroom

1. Escape Rooms Make Learning More Engaging

Let's face it—students are often more motivated when an activity feels like a challenge.

Instead of saying, "Today you are going to complete a worksheet with six questions," you might say:

"Today, you are going to work to complete a mission with six challenges. Can you escape?"

That small change can make an activity feel completely different.

Students have a purpose for completing each task, and the desire to reach the final goal can encourage them to keep working.


2. They Encourage Problem-Solving

Escape rooms naturally encourage students to think about information in different ways.

Students may need to figure out:

  • Which clue is important?

  • What information do we already know?

  • What do we need to figure out?

  • Which answer makes sense?

  • What should we try next?

These are valuable skills that go beyond memorizing information.

An escape room allows students to apply what they have learned rather than simply recall facts.


3. Students Practice Collaboration

Many escape room activities work especially well when students work in pairs or small groups.

Students can divide responsibilities, discuss possible answers, explain their thinking, and help one another.

One student may be good at finding clues while another is better at solving the puzzle.

This creates opportunities for students to practice:

  • Communication

  • Listening

  • Cooperation

  • Sharing ideas

  • Explaining their reasoning

  • Working toward a common goal

And when students successfully complete the challenge together, they get to celebrate their accomplishment as a team.


4. Escape Rooms Can Reinforce Curriculum Skills

An escape room doesn't have to replace your curriculum.

Instead, it can be used as a review activity, enrichment activity, center, early-finisher activity, seasonal activity, or end-of-unit challenge.

For example, a grammar escape room might have students practice capitalization and punctuation.

A math escape room might involve solving money problems.

A reading escape room could require students to read carefully to find information needed to solve each challenge.

This makes escape rooms a flexible addition to your existing lessons.


5. They Can Be Used With Different Learning Styles

One of the advantages of an interactive activity is that students aren't simply sitting and listening to a teacher.

Depending on the escape room, students may be:

  • Reading

  • Writing

  • Discussing

  • Cutting and sorting

  • Solving problems

  • Looking for clues

  • Drawing conclusions

  • Sequencing information

  • Working with visual materials

This variety can make a lesson feel more active and engaging.


6. Escape Rooms Can Be Used for Review

One of my favorite ways to use an escape room is as a review activity.

After students have learned a concept, an escape room can provide a fun way to see what they remember.

For example, instead of giving students another traditional review worksheet, you can turn the review into a challenge.

Can your students use what they've learned to complete the mission?

It can be especially helpful before a break, at the end of a unit, or when you want to add something different to your regular lesson routine.


7. You Don't Have to Spend Hours Preparing

This is one of the biggest benefits for busy teachers.

A classroom escape room doesn't have to mean creating elaborate props, locks, decorations, and complicated clues.

Print-and-go escape rooms can make preparation much easier.

Print the pages, gather whatever basic supplies are needed, and you're ready to create an interactive learning experience.

That's one reason I love creating escape room activities for teachers who want something fun for students but easy for the teacher to prepare.


How to Use an Escape Room in Your Classroom

Small Groups

Divide students into groups and let each group work through the challenges.

This gives students more opportunities to communicate and collaborate.

Partners

Pair students together and let them solve the challenges with a partner.

This can be especially helpful for younger students who may need a little more support.

Learning Centers

Set up an escape room as a center that students can complete during rotations.


Try a Classroom Escape Room!

If you're looking for a way to add more excitement to your lessons, consider trying a print-and-go escape room.

I create classroom escape rooms designed to make learning interactive while keeping preparation simple for teachers.

Here are a few of the escape room challenges available in my TPT store:

๐Ÿ“š Reading, Grammar & Language Arts

Capitalization and Punctuation Escape Room
Students practice important grammar skills while working through an escape room challenge.

๐Ÿ’ฐ Math

Counting Coins Escape Room Challenge
A fun way for young learners to practice beginning money skills and counting coins.

๐ŸŒŠ Science & Animal Habitats

Ocean Escape Room Challenge | Save the Ocean Animals
Students complete challenges while learning about ocean animals and helping to complete their mission.

Rainforest Escape Room Challenge 
Students enjoy completing tasks and navigating through different rainforest locations.

๐Ÿ“œ Social Studies

Save the U.S. Constitution Escape Room
A fun interactive activity that can be used when teaching about the U.S. Constitution.

✝️ Bible & Christian Education

For Christian classrooms, Sunday School, homeschool, and Bible lessons, I also have several Bible-themed escape rooms.

Students can learn about Bible stories while solving challenges based on:

These can be a fun way to add an interactive element to a Bible lesson while reinforcing the story and important details.


Make Your Next Lesson a Challenge!

Learning doesn't always have to look like a traditional worksheet.

Sometimes students need an opportunity to move, think, talk, solve, and work together.

A classroom escape room can turn a regular lesson into an experience.

Whether you use an escape room for review, enrichment, a learning center, a holiday activity, a Bible lesson, or simply to give your students something different to do, the goal is the same:

Make learning memorable.

And when students are excited to figure out what comes next, they may not even realize how much learning is happening along the way!

๐Ÿ” Ready to Try an Escape Room?

Visit my Teachers Pay Teachers store to browse my collection of print-and-go escape room activities.

๐Ÿ‘‰Mrs. Navarre's TPT Store  - Look for the custom categories on the left of my store page to find my Escape Room activities.


Wednesday, November 20, 2024

Minion Christmas Gift Boxes


Every year, I make a special gift for my family to help make the holiday even more special. Last year I saw this Minion Christmas Gift Box idea. I loved it, but I had already done my special family gifts. I decided then that it would be the gift for this year. My only problem was that I had no clue how to make it. The only thing I found was a picture. There were no directions, patterns, or anything else to help me accomplish my goal. I had to figure it out myself. To help others, I decided to share my process. 

There are a couple of things to keep in mind. For one thing, I bought the boxes and paper in bulk because I was creating nine of these boxes. This might be more than you need, but I will provide the links so that you can at least reference them. The other thing is that the measurements that I give are based on the size of the box I used. This means that if you use a different size box then you will have to modify the measurements to fit your box, but again it gives you a reference point. 

This post contains affiliate links, which means I make a small commission at no extra cost to you. Thank you for your support!


Material

  • Box 18" L x 14" W x 12" H (Boxes Set of 10)
  • Roll of yellow paper (Yellow Wrapping Paper Roll 17.5"x963")
  • Roll of green paper (Green Wrapping Paper Roll 17.5"x963")
  • Felt black, gray, red, green, white, and yellow
  • Black construction paper
  • Tape, glue, ruler, measuring tape, scissors, and glue gun
  • Pattern for eyes, goggles, buttons, arms, hands, holly, and letters


Cut paper

  • 1 Yellow 38” (front, top, back) = head
  • 2 Yellow 12"x12" = sides
  • 1 Green 26” (front, bottom, back) = bottom of overalls
  • 2 Green 6” H x 12” W = sides
  • 1 Green 5” H x 11” W = front bib of overall
  • 2 Green 5” H x 1” W = overall straps
  • 4 Black Strips 2” H x 12” W glued together to make one long strip = headband
  • 1 Black Strip 2” H x 9” W glued to close the headband


Cut felt

I have provided a link to the Pattern Pieces that I used. Some pieces you may notice in the pictures are just modified or free-hand versions that I made. I have also included letters for you to use. 

  • 2 Yellow 1” H x 12” W = arms
  • 2 Gray large circles = goggles
  • 2 White medium circles = eyeballs
  • 2 Black small circles = pupils
  • 2 Black hands
  • 2 Black buttons
  • 8 White tiny button whole pieces
  • 3 Green Holly leaves
  • 4 Red berries
  • 1 Blue Letter
  • 5+ Black hair strips


Gift Packet

I spent time gathering different minion gifts for these boxes. It wasn't easy. I found pretty much everything at Walmart and on Amazon. These gifts included shirts, mugs, toys, pillows, PJ bottoms, hoodies, socks, pins, a brush, and more. I also included snacks in blue wrappers, such as Oreos, Chocolate Chip Cookies, Jerkey, nuts, Ranch Chips, etc. I put the gifts in a plastic tote that I purchased from Dollar Tree. I also added minion stickers to the tote, which I purchased on Amazon. My plan was to put everything in a large gift bag, but the bag was too small. I cut the bag and made it work by taping it to the tote. Not great, but it worked. 

Note: You will want a plastic gift bag or tall gifts to take up some of the space in your box to make it look nicer. 


Assembly Directions - Putting the Paper on the Box

  1. Box - Assemble the box. Then place the gift package inside the box and tape it closed. I keep track of the front of the box so that it can be opened correctly (probably doesn’t matter).
  2. Head - Tape the 12”x12” yellow pieces to the sides. Then tape on the 38” yellow piece to cover the head (top part of the front, the top, and the top part of the back). The bottoms of the paper (front, sides, and back) should line up. Fold and tape the sides.
  3. Overalls - Tape the 6”x12” green pieces to the side. It should overlap the yellow by about an inch. Then tape on the 26” green piece to cover the pants (bottom part of the front, the bottom, and the bottom part of the back). The tops of the paper (front, sides, and back) should line up. Fold and tape the sides.
  4. Bib - (The top part of overall) Tape the 5”x11” green piece centered and about 11” from the bottom. Tape a 5”x1” green piece diagonally to each side of the top of the bib for straps.
  5. Headband - Glue the four 2”x12” black strips together making one long strip. Tape and/or glue the headband around the top of the box about an inch from the top. This strip does not go completely around the back of the box. I found this to be the best way to center and tape the strip in place. Glue on the 2”x9” piece to close the headband up.

Adding Felt Pieces

  1. Precut your felt pieces. Use my pattern pieces (Click the link- Pattern Pieces) or you can draw your own. I have found that using freezer paper (not waxed paper or parchment paper) makes cutting the felt much easier. Here are the steps: Trace or draw the felt pieces on the dull side of the paper. Turn your iron to medium heat (wool setting). Roughly cut around each piece and place them onto the correct color of felt. Next, place your iron on each piece for 30sec-1min ensuring that the paper is sticking to the felt. Cut apart the pieces when you are done. The freezer paper can be reused a few times, but I find it easier to retrace and use fresh paper because cutting the felt with paper is easier than cutting the felt without it.                                                                                                                                                                                                                                                                               

                                
  2. Heat your hot glue gun. Preassemble eyes onto goggles, hands onto arms, button holes onto buttons, and berries onto the holy. Then glue all of the pieces onto the box. Be sure to glue your hands in a cute or funny position to give your minion more character.    
  3. Next, add the hair. I’ve done this several different ways. I’ve added five short pieces standing up on the forehead; I’ve glued eight strips (four on each side) to the top of the head; I’ve glued four pieces together and hung them in a slanted position for a come-over effect; and I’ve even done braids.
  4. Lastly, add a Christmas hat to finish off your Christmas Minion. I purchased mine from Dollar Tree. I folded paper to make a cone. Then I put the hat over it to help it stand.                                                                                                                                                                                                                                   
                                          
Additional Tips
  • Use an empty box to test the paper out. This will allow you to check your measurements and give you a sense of how you are going to do it when the box is full. 
  • Using a smaller box is always an option. I recommend keeping the rectangular shape vs a square for cuteness purposes. 
  • Don't be afraid to play around with your felt pieces. I wanted all my minions to look a little different so I added special traits: one eye, braids, bows, headbands, different hairstyles, a banana, teeth, a round mouth, and different hand positions. 
  • I like using the felt, but this could be done simply using construction paper.


I've tried to explain how to make the Minion Gift Boxes the best I can. Please forgive me for any confusion or error. I kind of went on auto-pilot after making a couple of them, but I have tried to include all of the steps. If nothing else, I'm sure you will find the pattern pieces and pictures helpful. Have fun creating your minion and don't feel rushed. And while this is a great Christmas gift, I think it would also make for a wonderful birthday or other special gift. I'd just change the color of the overalls back to blue. 

Merry Christmas!


Wednesday, September 6, 2023

Christian Resources for Kids


I find myself creating more and more Christian resources for children. This is because I believe that it is important, especially in this day and age, for children to learn about God, His Son Jesus, the Holy Spirit, and God's promises. 

I have an overwhelming desire to create and share my resources. Fortunately, I have been able to share my resources through my TPT Store. Unfortunately, I have no way of organizing them in an easy-to-find way. They are listed by title with helpful tags, but that is not really a good at-a-glance of what I have available. With that said, I decided to post a blog that shows my resources along with the links that will allow you to get a more in-depth view of the product. 

Update: Since first posting this blog post TPT has allowed for custom categories, so I actually do have a way of making my Bible resources easier to access. I also have about twice as many. Click on the link to get to my TPT Bible Resource Page: https://bit.ly/4gnqXYX


Books of the Bible Cards for Kid

This is a resource for providing kids with a hands-on interactive approach to learning the books of the Bible. 


This packet is a resource for helping kids learn the Ten Commandments. Children are actively engaged as they complete the practice activities. 


This is one of my most popular resources. It provides children with opportunities to practice the Lord's Prayer and understand it. 


This packet is a helpful resource for teaching children about Jesus' commandments. Unfortunately, many children no little or nothing about these commandments. They have only heard of the Ten Commandments.


Teaching children about communion is one that is rarely taught, but important for kids to understand. This packet includes resources to help teach about communion. 


This packet includes the five resources mentioned above. You can save money by purchasing the bundled set. 


This book of 30 different Bible verses is a great way to get children into the Word of God. 


This resource is an interactive PowerPoint which is another fun way for children to practice scripture and learn the Word of God. 

This Jeopardy game is one of my Sunday School class favorites. The game is a fun way for children to learn more about the people in the Bible. 


This packet is a resource that focuses on the "light of the world" using Bible verses Matthew 5:14-15 and John 8:12, along with the song "This Little Light of Mine." 


This packet includes 18 pages to help teach the story of creation. The focus is on Genesis 1-2:1-3, which details God's work for the first seven days. 


This packet places an emphasis on Genesis 2:4-25,3, which details the story of Adam and Eve, the fall, and the curse. 


The emphasis of this packet is on Genesis 6-8, which details God's unhappiness and actions over a disobedient and sinful world. It also tells us about God's grace and faithfulness.


This is a 17 page resource to help teach children the story of Jonah and the Whale (Jonah 1-4). It tells how Jonah tried to flee from God; was swallowed by a whale; and eventually carried God's message to Nineveh. 

This is a fun resource for teaching children both the story and the message in 1 Samuel 17. The activities in this packet are interactive and engaging. 


This packet includes the five previously mentioned Bible stories. Purchasing the resources in a bundle is a good way to save. 


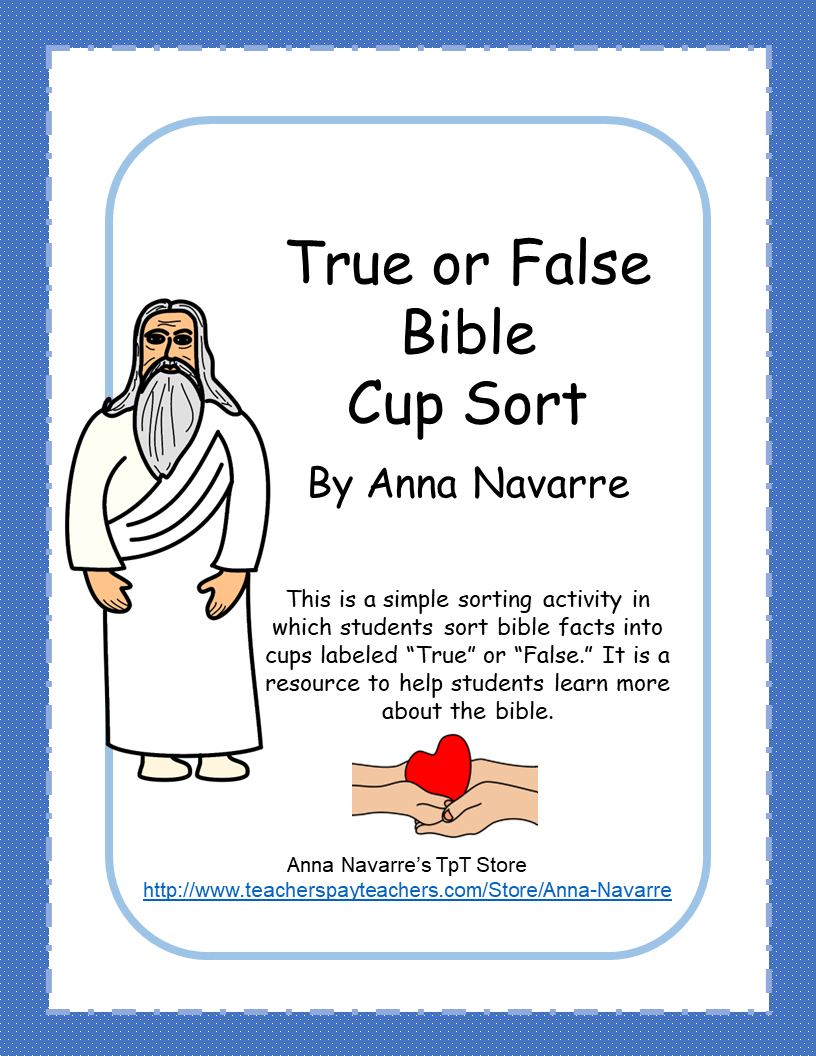
This is a simple sorting activity that students can play. They read a card and then determine if the statement is true or false. Then they sort it into the correct cup. It is a fun way to learn and discuss Bible facts. 


This game works well as a team or partner activity. It is an interactive PowerPoint that is played like Jeopardy. 


This audio PowerPoint resource tells the Story of Noah's Ark. 


This packet helps to teach the story of Job. While a little long, the Book of Job has some important messages for children to learn. The summarized story helps to make it easier to understand. 


This packet is a helpful resource for teaching the story of Daniel in the Lions' Den. The emphasis is on Daniel 2-3, 6. The summarized chapters provide information about Daniel and his friends, Shadrach, Meshach, and Abednego. 


The Whole Armor of God packet helps to teach children about the tools that God has equipped us with to protect ourselves against the attacks of Satan. 


Students learn about Ruth and her mother-in-law, Naomi. With guidance, students can begin to understand the message of God in this story: God is faithful, we can trust God, God helps ordinary people, and God uses bad things for good. 

John 3:16 Resource Packet

Students practice and learn John 3:16 Bible verse. They also begin to understand it and learn how it can be applied to our lives. 

Friday, February 24, 2023

St. Patrick's Day Roll and Cover Addition

I have probably said this several times before, but I love using holidays in the classroom. I especially love using them as a theme. I use books and videos to make sure students understand the holiday, but to make the holiday fun I use games and other activities. 

St. Patrick's Day is one of those holidays I use. I spend the week focused on activities using the St. Patrick's Day theme. On the actual day that we celebrate St. Patrick's Day, I love setting my classroom desks in the shape of a shamrock, adding green construction paper, and providing students with a fun gift bag. 

During the week, I use several games. One of the games I like to use is my St. Patrick's Roll and Cover Addition Boards game. Every time I use this game, my students have so much fun with it, which is the reason I decided to share this game with you. 

This game is an interactive game in which students focus on addition. I place a huge emphasis on using doubles, so it is really exciting to see my students adding two and even three numbers using doubles and other addition strategies.

This game is so easy to prep that I am able to have my whole class play at the same time. I have them play as partners giving everyone a game board and a page of shamrocks. I cut up a pot of gold page for each group to share. As I mentioned, it is a fun game that my class always enjoys playing. 

If you are interested, you can check out this St. Patrick's Day Roll and Cover Addition game in my TPT Store. 


You can also visit my TPT Store to view my other resources. 

Saturday, January 21, 2023

Teaching Groundhog's Day in the Classroom


Groundhog’s Day (Feb. 2) is an easily overlooked holiday. It is one of those holidays that kind of sneaks up on you, and even if you do decide to teach it, it is almost too late. Well, this packet is perfect for that last minute decision to include this holiday in your already busy schedule.

It is important to me to make the classroom experience unique and exciting for my students. I know that that is not always possible, but holidays are a perfect chance for me to step it up for them. I love when students say, "This was the best day ever!" Okay, so maybe they don't exactly say that about Groundhog's Day, but they do enjoy it. If I took it a step further I know that it would be one of their favorites. Instead, I keep it kind of simple, yet different from the normal daily routine. 

I like to start the day off by having a big sign displayed that says, “Happy Groundhog’s Day.” I usually just write it on the whiteboard in different color markers. I have some posters from Weekly Reader that I like to have hanging up as well.


Once my students are settled, I explain that it is Groundhog’s Day and then I tell them a little about this holiday. You can easily Google it, but here are a couple of easy-to-use websites that you might like:


Britannica - https://www.britannica.com/topic/Groundhog-Day

National Today - https://nationaltoday.com/groundhog-day/


Once they have a quick idea of what Groundhog’s Day is, I show a YouTube video that shows whether Punxsutawney Phil saw his shadow or not.


As the day progresses, I use other resources that I have collected over the years along with my Groundhog's Day packet in order to keep with the Groundhog's Day theme. This packet includes a simple art project in which students learn to read a poem and use their groundhog to pop out of its hole. There is also a making words activity, a word search, and a finger puppet retell with facts.  


The puppet retell is a fun activity that allows students to learn some facts about the groundhog and then use their finger puppets to share the facts with a friend. They can use their puppets to share other facts that they have learned as well. 


These activities are a great way to keep students engaged as they learn about this holiday. The wonderful part about it is that they are still growing in various academic areas. 


Click on the link if you are interested in checking out this resource. 

Groundhog's Day Resource Packet


Happy Groundhog's Day!